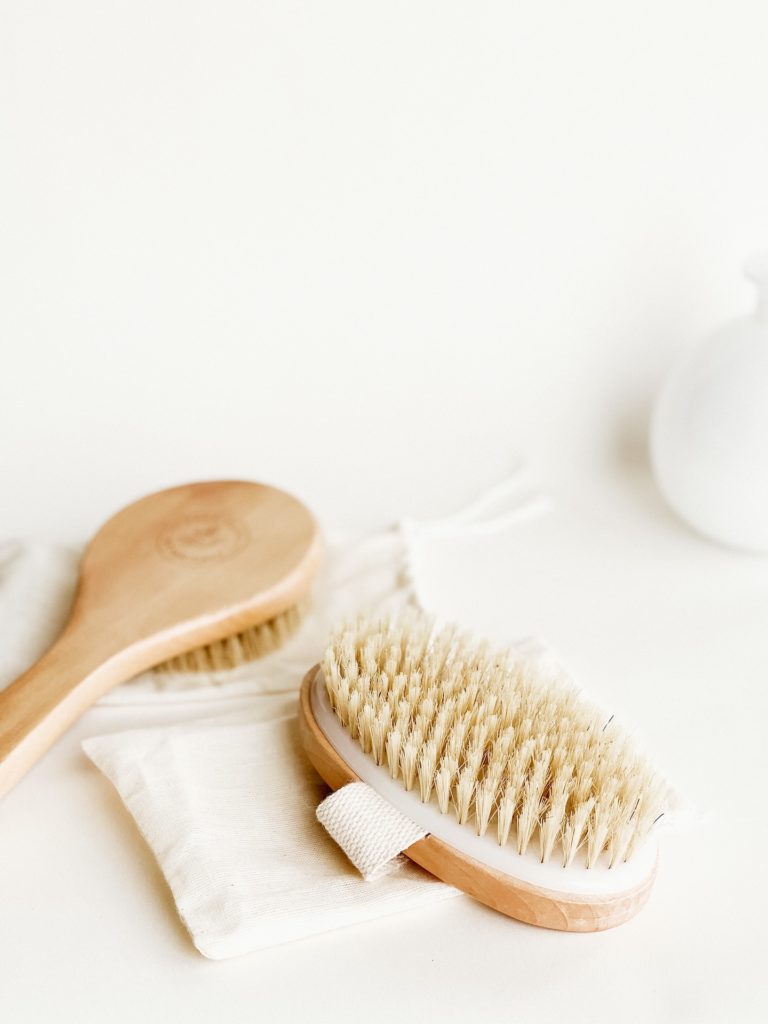
While I adore booking myself a relaxing facial or spa treatment, there’s nothing I truly love more than taking a long, hot shower at home, moisturizing, and slipping into some comfy pajamas. Luckily, I found a simple, affordable technique for my at-home self care routine that keeps my skin looking and feeling amazing: dry brushing!
Since adding dry brushing to my self care routine, my skin has looked healthier and felt softer. Plus, with the way it improves circulation, I’m breaking out less!
If you want to try dry brushing for yourself, here’s how to get started today.
What Is Dry Brushing?
Dry brushing is a technique in which you brush your dry skin with a stiff-bristled brush to improve circulation and exfoliate. It goes back as far as ancient Egypt, but it was also popular in Indian and Chinese medicine.
Today, you can get professionally dry brushed at many massage parlors and spas… or you can do it at home!
What Are The Benefits of Dry Brushing?
Dry brushing benefits your entire body, inside and out! It exfoliates your skin by removing dead skin cells. Plus, by improving circulation, it can give your skin a healthy glow and even reduce the look of cellulite.
Inside the body, dry brushing can help improve lymphatic drainage and improve circulation in the areas you brush.
Can You Dry Brush Your Face?
While you can dry brush your face, you might not want to. Personally, I’ve found that the skin on my face (especially near my eyes) is far too sensitive for a stiff-bristled brush. If you really want to try dry brushing your face, I recommend doing a patch test beforehand and being very gentle.
Luckily, if you have sensitive skin like me, you can get similar results with a dry wash cloth.
What You Need to Get Started
1. A Dry Brush
Get yourself a wooden brush with stiff, natural bristles. My favorite is the kind with a long handle so I can reach my shoulders and back like this one.
2. Lotion or Moisturizer
After you’re done dry brushing and showering, you’ll want to follow up with a lotion or moisturizer. I’ve been swearing by this one.
3. A Dry Wash Cloth
If you want to dry brush your face, try using a dry wash cloth instead of your brush. This will be way gentler on your skin and help you avoid irritation. I like these ones.
How to Dry Brush At Home
Step 1: Patch Test
I know, I know. Patch testing is a pain! But before you dry brush your entire body, try it on one patch of skin, shower, moisturize, and sleep on it.
Step 2: Start At Your Ankles And Move Up
When you’re ready to start dry brushing, make sure your body is entirely dry without any moisturizer or oil. Then, brush in slow circles starting at your ankles. Move upwards towards your heart, and repeat that path on your legs, your arms, and your back and chest.
Step 3: Gently Dry Brush Your Face
If you want to dry brush your face and neck, go in with that dry wash cloth and rub it in the same circular motion. Start at your hairline and work downwards towards your heart.
Step 4: Shower
Once you’ve dry brushed everywhere, hop in the shower! This is going to clean off all those dead skin cells you’ve loosened.
Step 5: Moisturize
After your shower, use a full-body moisturizer, lotion, or oil to lock in moisture and soothe your skin. Then, repeat before every shower and enjoy your glow! If you’re curious about switching to a clean skin care regimen, check out this post.
Add a little more wellness to your daily routine.
There are tons of ways to work self care and wellness into even the busiest schedules. If you’re ready to rethink your day-to-day wellness routines, check out my Voxer coaching program or follow me on Instagram. I’ll help you evaluate your routines, create space for self care, and design a life you truly love.




+ show Comments
- Hide Comments
add a comment